


In this blog , we are going to know about Loading data from Azure Blob Storage to Snowflake. This is a common ETL (Extract, Transform, Load) task for data engineers and analysts. This guide walk's you through the process using Snowflake SQL queries to seamlessly transfer a CSV file from Azure blob to Snowflake table.
Step 1: Create a Database
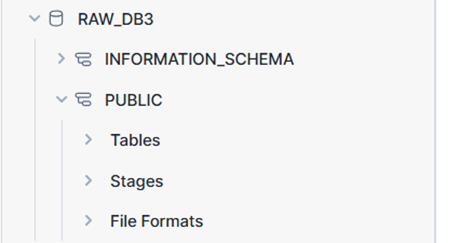
First, create a database in Snowflake to store your data. The following command creates a database named raw_azure_db if it doesn’t already exist.

Use default schema or create a separate schema using. Here I’m using the default schema “PUBLIC” as my schema.

Procedure to create azure account:
Step 1.1: Sign In to the Azure Portal
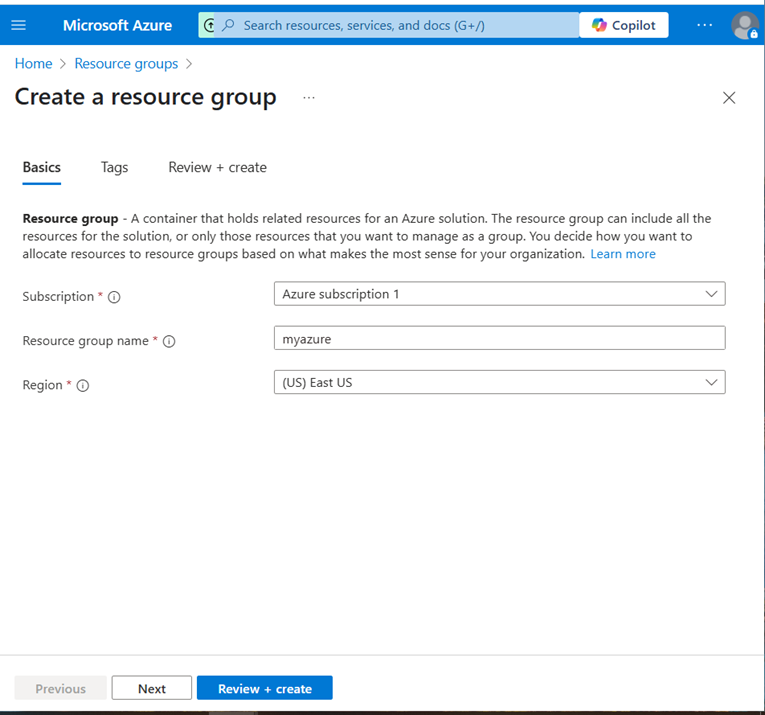
Step 1.2: Create a Resource Group
A resource group is a logical container for Azure resources. Let’s create one for our storage account.
Step 1.3: Create a Storage Account
The storage account provides a unique namespace for your Blob Storage data.
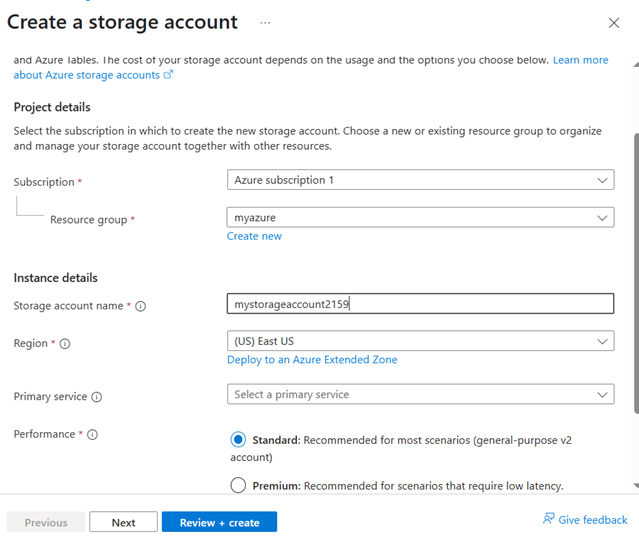
Must be lowercase, 3–24 characters, letters, and numbers only.
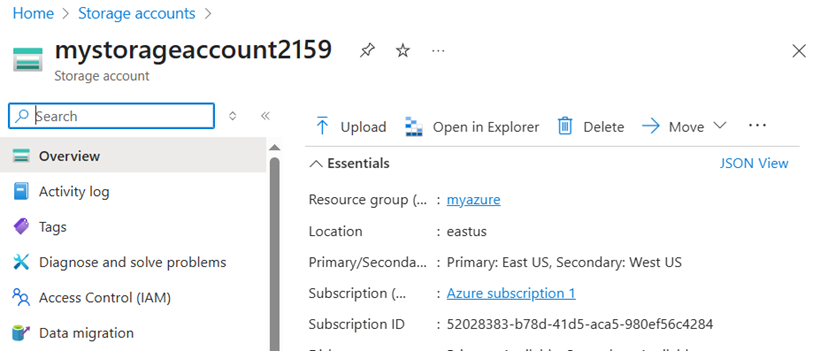
-Region: Choose the same region as your resource group (e.g., East US).common Name: mystorageaccount2159 (unique, descriptive, and aligns with your blobstorage2159 example).
Step 1.4: upload the data(azure):
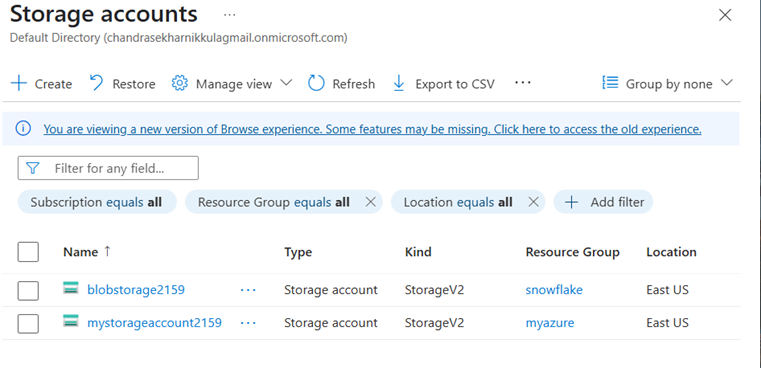
Go to storage accounts And click refresh and click the created storage account and click the upload button on top.then browse the files and uploaded
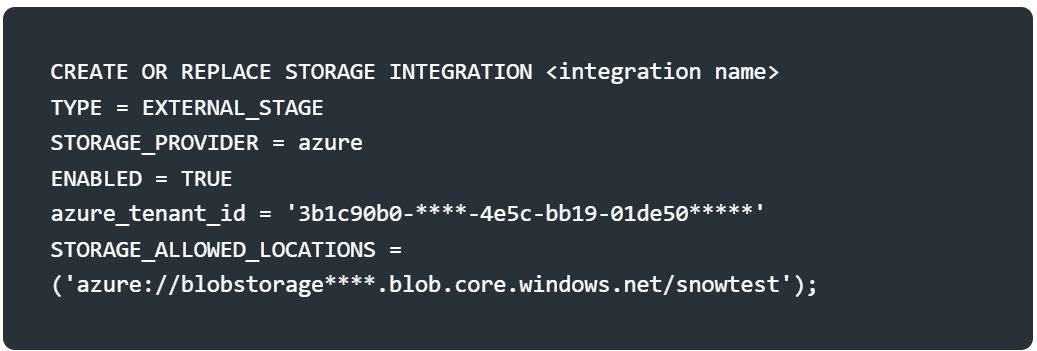
To connect Snowflake with Azure Blob Storage, create a storage integration. This defines the connection parameters, including the Azure tenant ID and allowed storage locations.
After creating the integration, describe it to verify the setup:

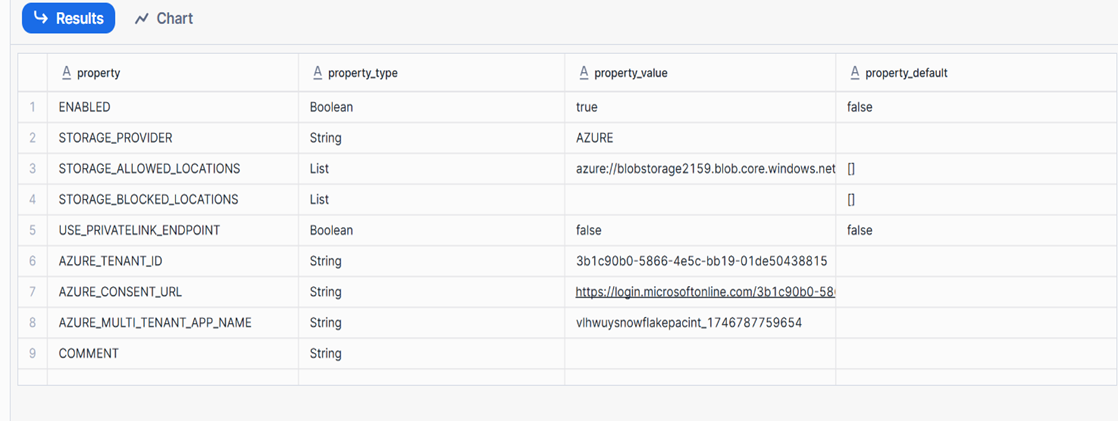
After creating the storage integration, you need to authorize Snowflake to access your Azure Blob Storage. Here’s how
Copy the azure_content_url from the output
Note: Ensure the Azure tenant ID and storage URL match your Azure account details. You may need to grant Snowflake access to the Azure storage account via role-based access control (RBAC).
Define a file format to specify how Snowflake should parse the CSV file. Here, we create a CSV file format that skips the header row and uses a comma as the delimiter.

Adjust the SKIP_HEADER or FIELD_DELIMITER based on your CSV file’s structure.
Define a file format to specify how Snowflake should parse the CSV file. Here, we create a CSV file format that skips the header row and uses a comma as the delimiter.

Adjust the SKIP_HEADER or FIELD_DELIMITER based on your CSV file’s structure.
A stage in Snowflake is a reference to the external storage location (Azure Blob Storage). The stage links to the storage integration and specifies the file format.

Preview the data in the stage to confirm the file is accessible and formatted correctly.

This query displays the raw contents of the CSV file as a single column. Check for any parsing issues here.
Create a table in Snowflake to store the data from the CSV file. The table’s schema should match the CSV file’s structure.
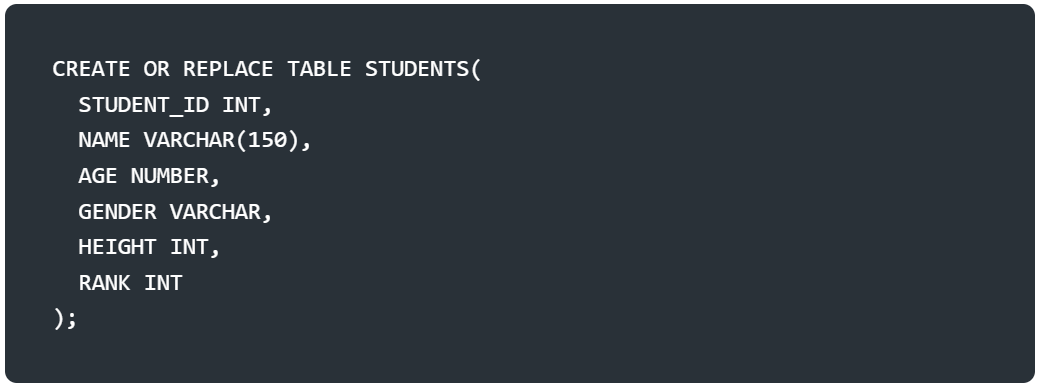
Ensure the column names and data types align with the CSV file’s columns.
Use the COPY INTO command to load the data from the Azure stage into the STUDENTS2 table. The ON_ERROR = CONTINUE option ensures the process continues even if some rows fail to load.

Query the table to confirm the data was loaded successfully.

You’ve now loaded a CSV file from Azure Blob Storage into a Snowflake table! The process involves setting up a database, connecting Snowflake to Azure via a storage integration, defining a file format, staging the data, and loading it into a table. If you encounter issues, verify the Azure URL, file format, and column mappings. For large datasets, consider Snowflake’s parallel loading capabilities to optimize performance.