
A Listing is a way to publish and distribute data from one Snowflake account to another, even across cloud platforms and geographic regions. Its built-on top of Shares but makes them discoverable and consumable by specific accounts or the broader Snowflake Marketplace.
For private (controlled) sharing, Listings act as a bridge: we create a share, wrap it into a listing, and then distribute that listing to target accounts.
Follow along with me step by step as we set up Snowflake data sharing from AWS to Azure using a Private Listing. We’ll start from the provider side and go all the way to seeing the shared table reflected in the consumer account.
Switch to ACCOUNTADMIN role
SELECT SYSTEM$ENABLE_GLOBAL_DATA_SHARING_FOR_ACCOUNT(‘ACCOUNT_NAME’);
This system function is used to verify and enable global (cross-cloud / cross-region) data sharing for a Snowflake account. It is a mandatory prerequisite when data is shared using Snowflake Listings between different cloud providers such as AWS to Azure or AWS to GCP.
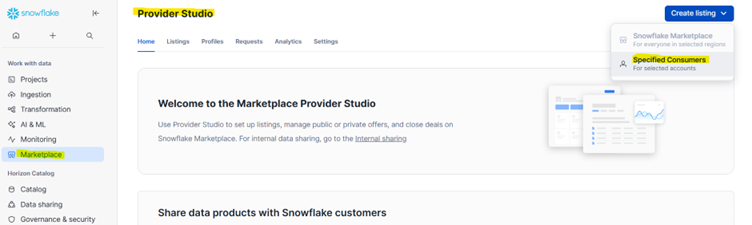
1. Go to “Marketplace” → “Provider Studio”in the Snowflake UI.
2. Click “Create Listing” and select “Specified Consumers”.
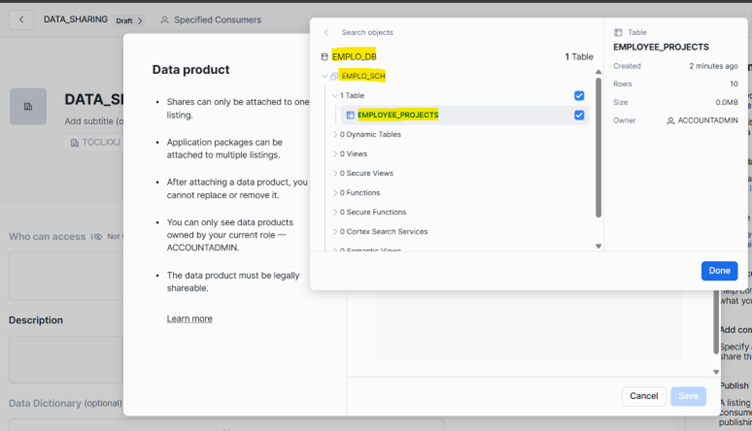
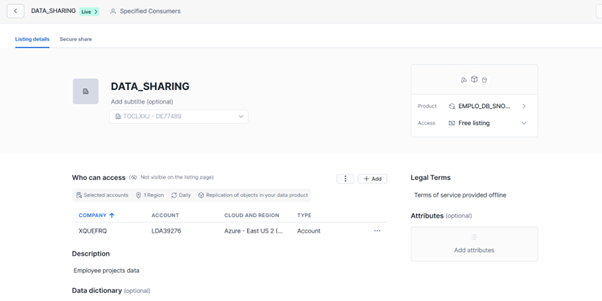
3. Give your listing name (In this case it is DATA_SHARING) and click “Save”.
4. Add the data product by selecting database, schema, and tables or views to the share and click ‘Done’.
5. After saving, we must select an access type. In snowflake marketplace or private listing, access type determines how consumers will access and be billed for the data product or application that a provider is offering.
- Free listing allow consumer to access the data product without paying anything for that listing itself. If published privately, only specified accounts can access it(but still free).
- Paid listing require consumer to purchase access before they can install and use the data product.
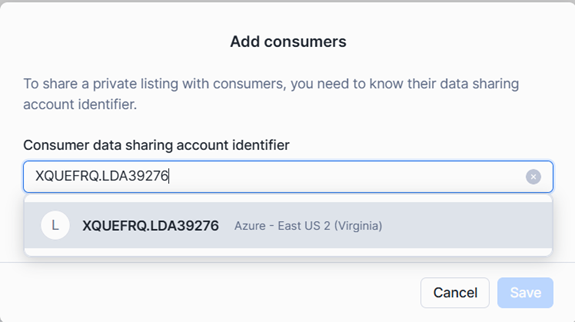
6. Enter the Consumer Snowflake account identifier and click ‘Save’.
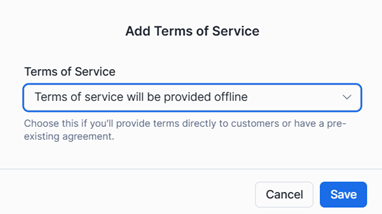
7. After adding consumers, click ‘Add Legal terms. By selecting one legal term and click ’save’.
- Standard Agreement for Market Products: Snowflake provides a standard agreement that governs the use of Marketplace.
- Custom: Providers can define custom legal terms that consumers must review and accept before accessing the listing.
- Terms of service will be provided offline: Providers can manage legal agreements externally when a pre-existing agreement is already in place or when terms are shared outside Snowflake.
8. Publish the listing.
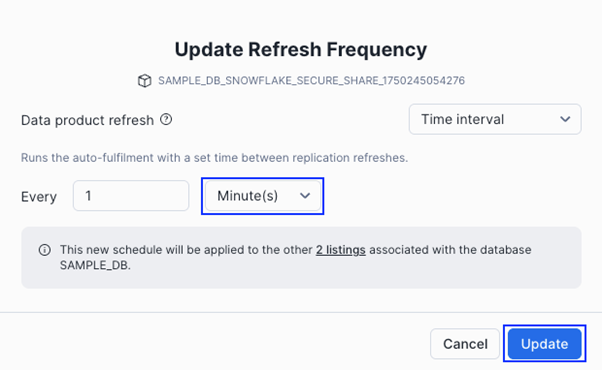
To make sure that the changes in the “provider account” are reflected quickly in the “consumer account”, follow these steps when creating the listing:
1. Go to “Marketplace” → “Provider Studio” in the provider account From the Snowflake UI, click on “Listings”.
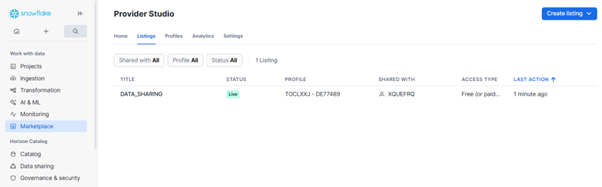
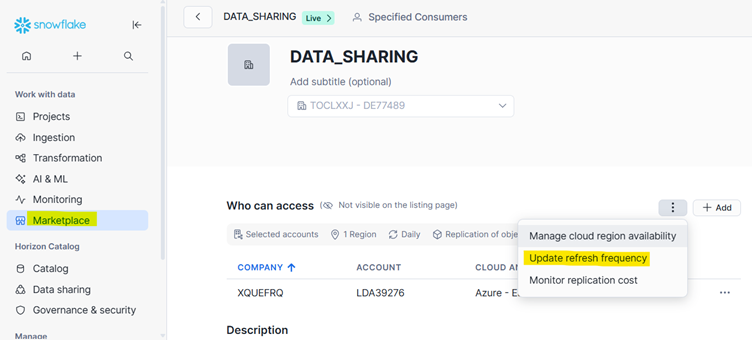
2. Select our previously created listing “DATA_SHARING”.
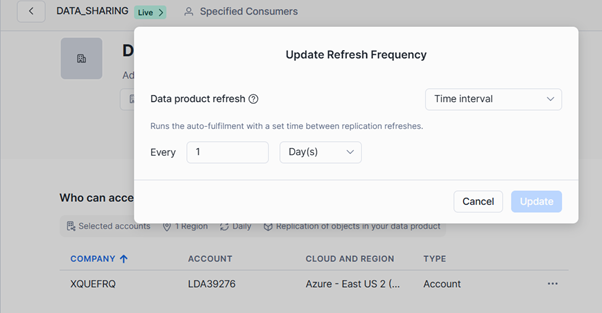
3. In the “Who can access” section, click on three dots and select “Update refresh frequency”.
4. In the “Refresh Frequency” section
- Time Interval: Snowflake automatically refreshes the shared data every minutes/hours/day.
- Scheduled Time: Auto-fulfils listing at a specific scheduled time.
- On-demand only: Refreshes listing only when triggered by task fulfilment.
1. Log into the Azure Snowflake account.
2. Navigate to “Data Products” → “DATA_SHARING”.
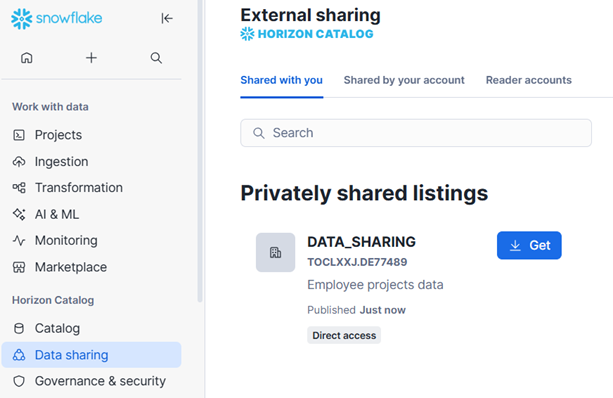
3. Locate the listing named “DATA_SHARING” and click “Get”.
4. On the configuration screen, either enter a custom database name or leave the default name as is, then click “Get”. By default account admin can access the
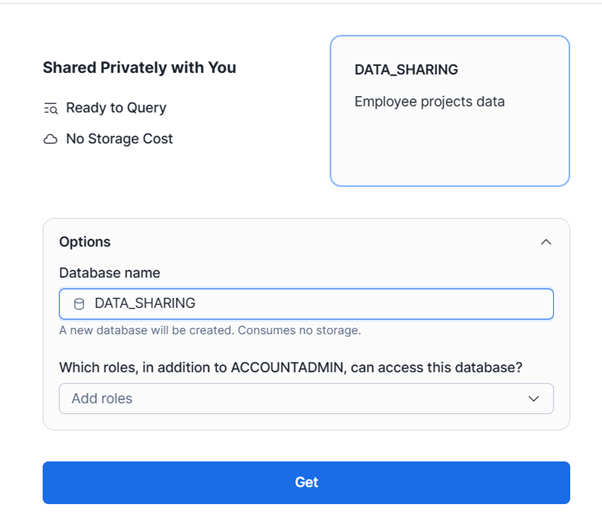
5. After the setup is complete, click Done.
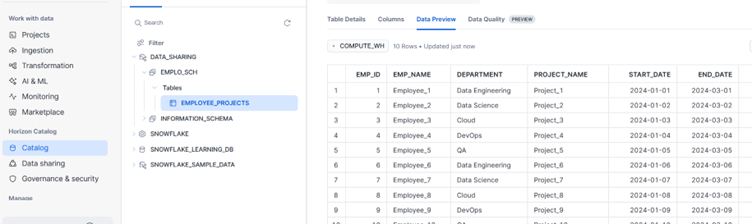
6. A new database will now appear in Azure Snowflake account “Data”—this is our live connection to the shared data, ready for querying.
In this documentation, we explored how to share data across different cloud providers using Snowflake Listings, specifically from an AWS-hosted account to an Azure-hosted account. By using a Private Listing, we were able to securely publish data and access it from another Snowflake account without the need for any ETL jobs or complex integrations.
This approach is simple, scalable, and production-friendly—ideal for organizations working in multi-cloud environments or collaborating with external partners.
With just a few UI clicks and minimal configuration, we’ve established a live data link across cloud boundaries and ensured frequent refresh intervals.