
The objective
Analytics teams need more than a one-time data copy. In this proof of concept, a local MySQL events table was connected to ClickHouse Cloud through ClickPipes for MySQL. The pipeline completed an initial snapshot and then captured a new MySQL record through change data capture (CDC).
Because the MySQL server ran on a private laptop, it was not directly reachable by ClickHouse Cloud. A temporary TCP tunnel provided the intermediate connectivity path for the learning POC. Connection addresses, passwords, and account identifiers are intentionally excluded.
Architecture
ClickPipes is the managed ingestion component: it performs the initial snapshot and then reads MySQL binary logs for future changes. It supports one-time loads, CDC-only replication, or both. For production, use a protected path such as private networking or SSH tunnelling rather than a temporary public endpoint.
Step 1: Prepare MySQL for CDC
The source table needs a primary key, and MySQL must use row-based binary logging. The configuration below provides the information CDC needs to interpret inserts, updates, and deletes.
| Requirement | Setting | Why it matters |
|---|---|---|
| Binary logging | log_bin = ON | Makes changes available to CDC. |
| Binlog format | ROW | Captures row-level events. |
| Row image | FULL | Supplies complete changed-row values. |
| Row metadata | FULL | Supplies column metadata. |
| GTID mode | ON | Provides durable replication positioning. |
Use a dedicated, least-privilege MySQL replication account. Do not use the MySQL root account.
Step 2: Enter ClickPipe connection details
In ClickHouse Cloud, open Data sources → ClickPipes → New, choose MySQL, and enter the temporary endpoint host and port together with the dedicated MySQL replication user. Select Initial load + CDC so existing data and later changes are both processed.
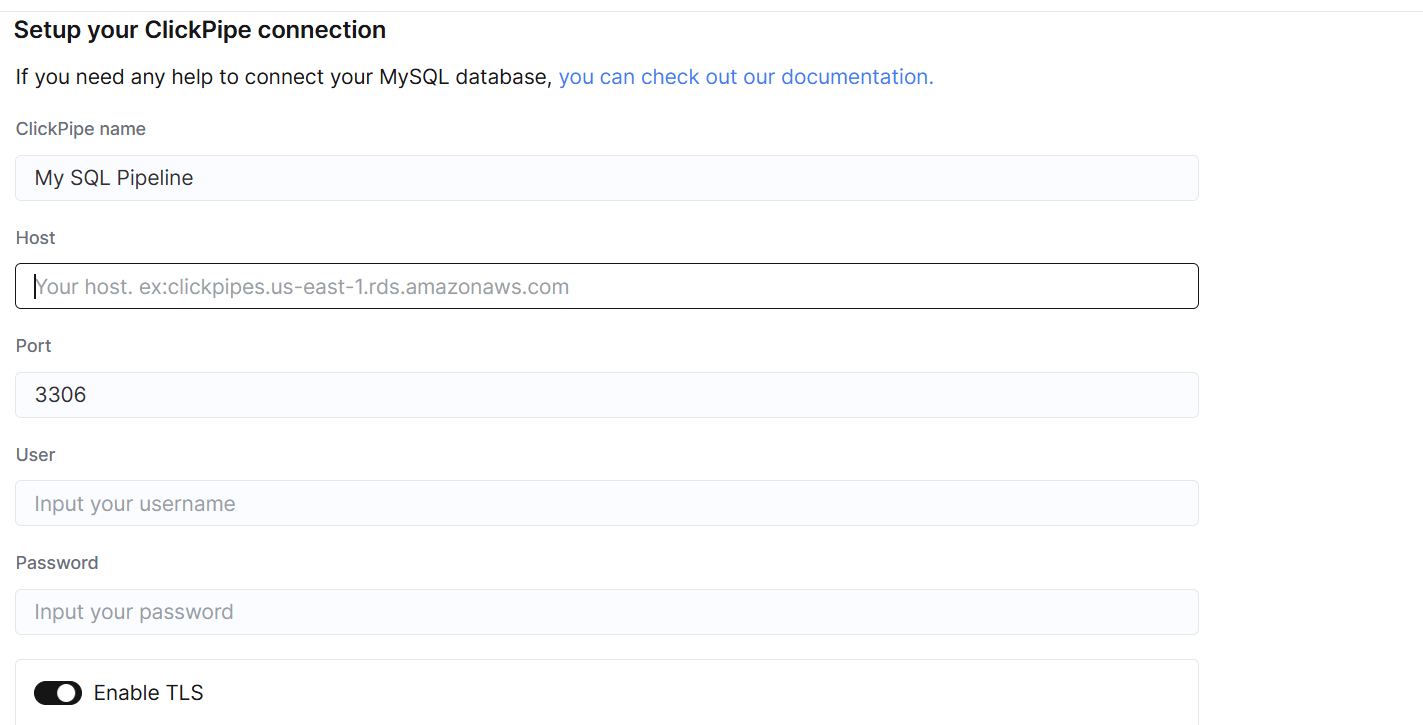
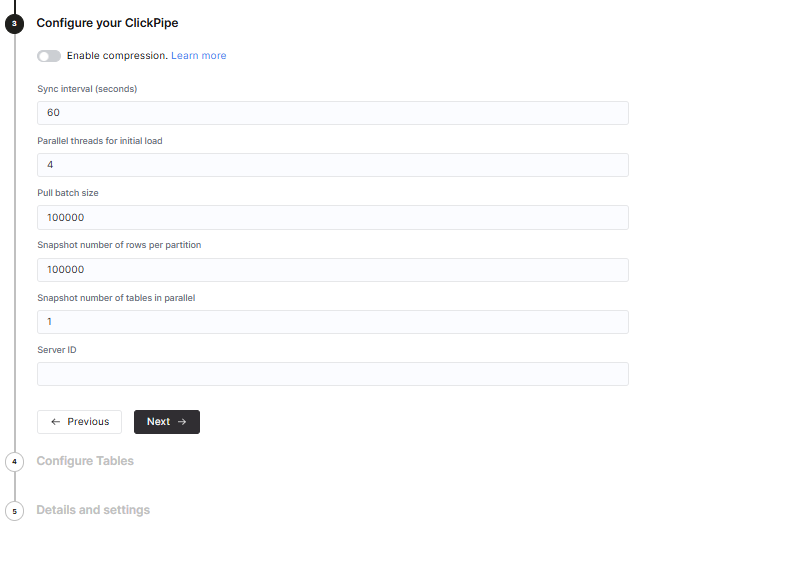
Step 3: Configure the pipe
Use the configuration page to set the change sync interval and control the initial-load behaviour. Start with defaults for a POC; tune parallelism and batch sizes only after measuring source impact and throughput.
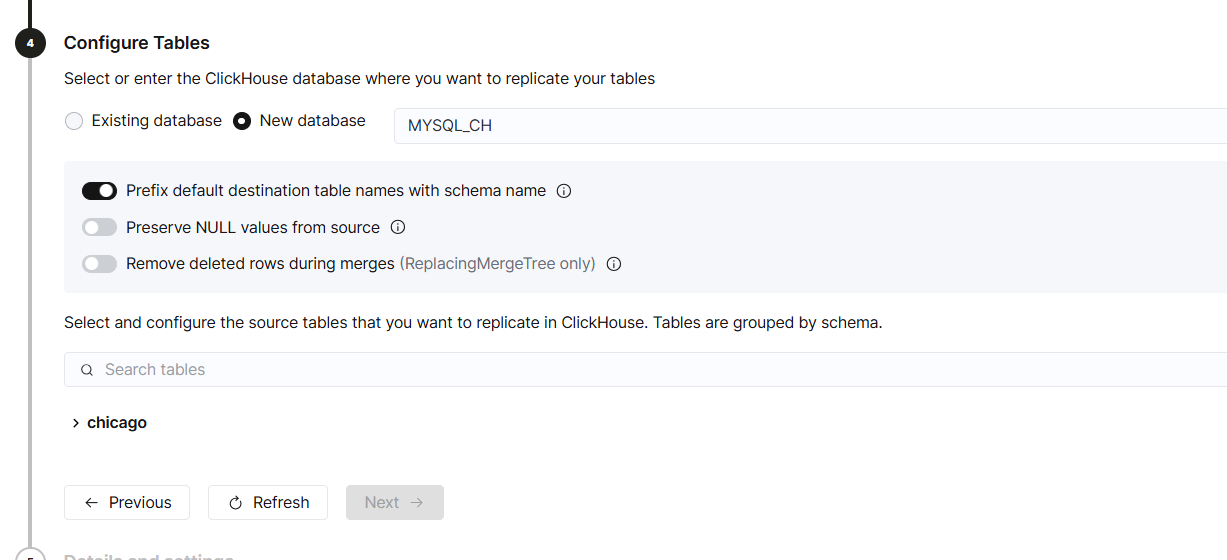
Step 4: Choose the database and source tables
Choose an existing ClickHouse database or create a dedicated destination database. Expand the source schema, select the table to replicate, and continue through the wizard.
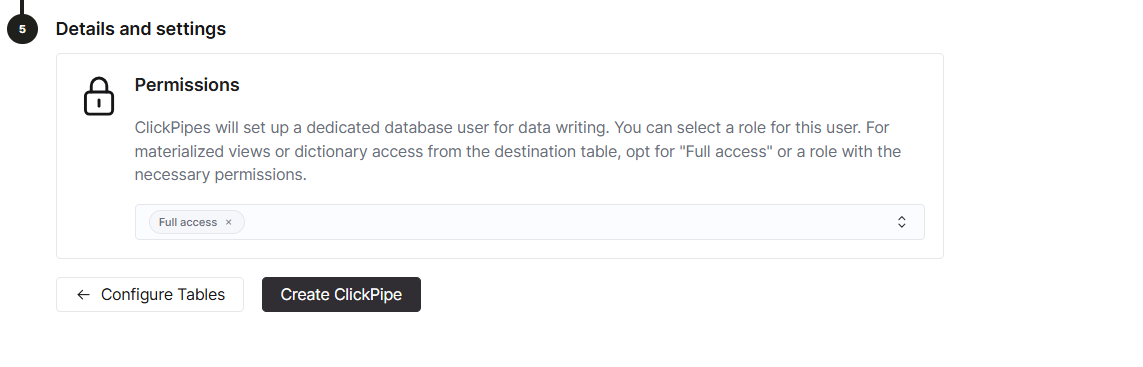
Step 5: Review permissions and create the ClickPipe
ClickPipes creates a dedicated ClickHouse user for writing data. Select the appropriate destination role, review the configuration, and choose Create ClickPipe.
Validate the initial load and CDC
After the initial snapshot completes, insert a controlled test record into MySQL. Then validate that it has arrived in the ClickHouse destination table:
SELECT event_id, event_time, event_name, product, amount, region
FROM <destination_database>.<destination_table>
WHERE event_id = <cdc_test_event_id>;
The POC confirmed that an inserted source record was captured after the snapshot, proving that the pipe continued as CDC rather than ending as a one-time copy.
Conclusion
ClickPipes offers a managed route from MySQL to ClickHouse Cloud for both historical data and ongoing changes. With a CDC-ready MySQL source and secure connectivity, the resulting ClickHouse table is ready for SQL analytics and BI reporting.
Learn more in the official ClickPipes for MySQL CDC documentation.